This is a small guide for beginners on how to replicate two effects found in Balatro, the Vortex in the Main Menu and the in game Board.
Below is a step-by-step guide, and at the end, you'll find an interactive shader graph of this shader.
The shader we’ll create is relatively simple, but in addition to a basic distortion, we’ll explore a few other techniques that are extremely useful for creating UI shaders. These include:
Panning textures
Simple distortions
Polar coordinates
Layering two different effects using a lerp
Tinting textures
Step 01: UV Twist
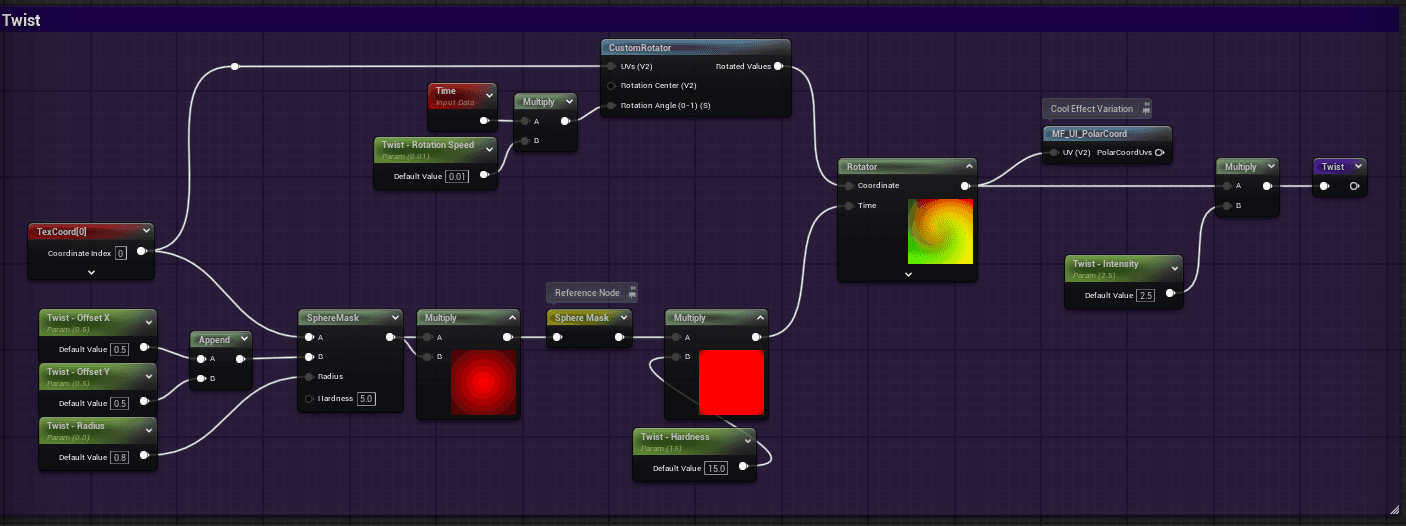
Use the Rotator node to create a spiral effect in the texture UVs. Combine it with a sphere mask and a time parameter to control the speed, center point, and edge transitions. The custom Rotator rotates the entire spiral, which isn’t necessary but adds a subtle enhancement to the final result.
Step 02: UV Distortion

Apply the twist to the coordinates of the Panner since we also want to pan this noise texture. When applying this distortion to the noise texture, you might notice some artifacts. I recommend changing the Mip Value Mode to Derivative and using a new Texture Coordinate to connect it to a DDX and a DDY on the texture. In this case, I’m using a Named Reroute Node to keep the graph cleaner, as I’ll use the same technique later in the shader.
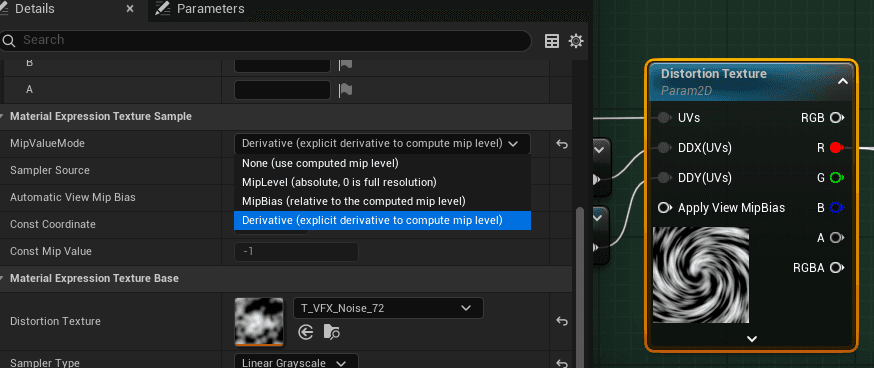
After this, we need to create a parameter to control the intensity of this distortion in the upcoming textures. To do this, simply create a scalar parameter and multiply it with the texture. Later, I’ll add another distortion using polar coordinates. This step isn’t necessary but adds some extra flavor to the noises inside the vortex. For this, I created the following Material Function.
Polar Coordinates Material Function

Note: Check this checkbox to be able to search for this function within your shader, just like you would search for any other node.

Step 03: Vortex
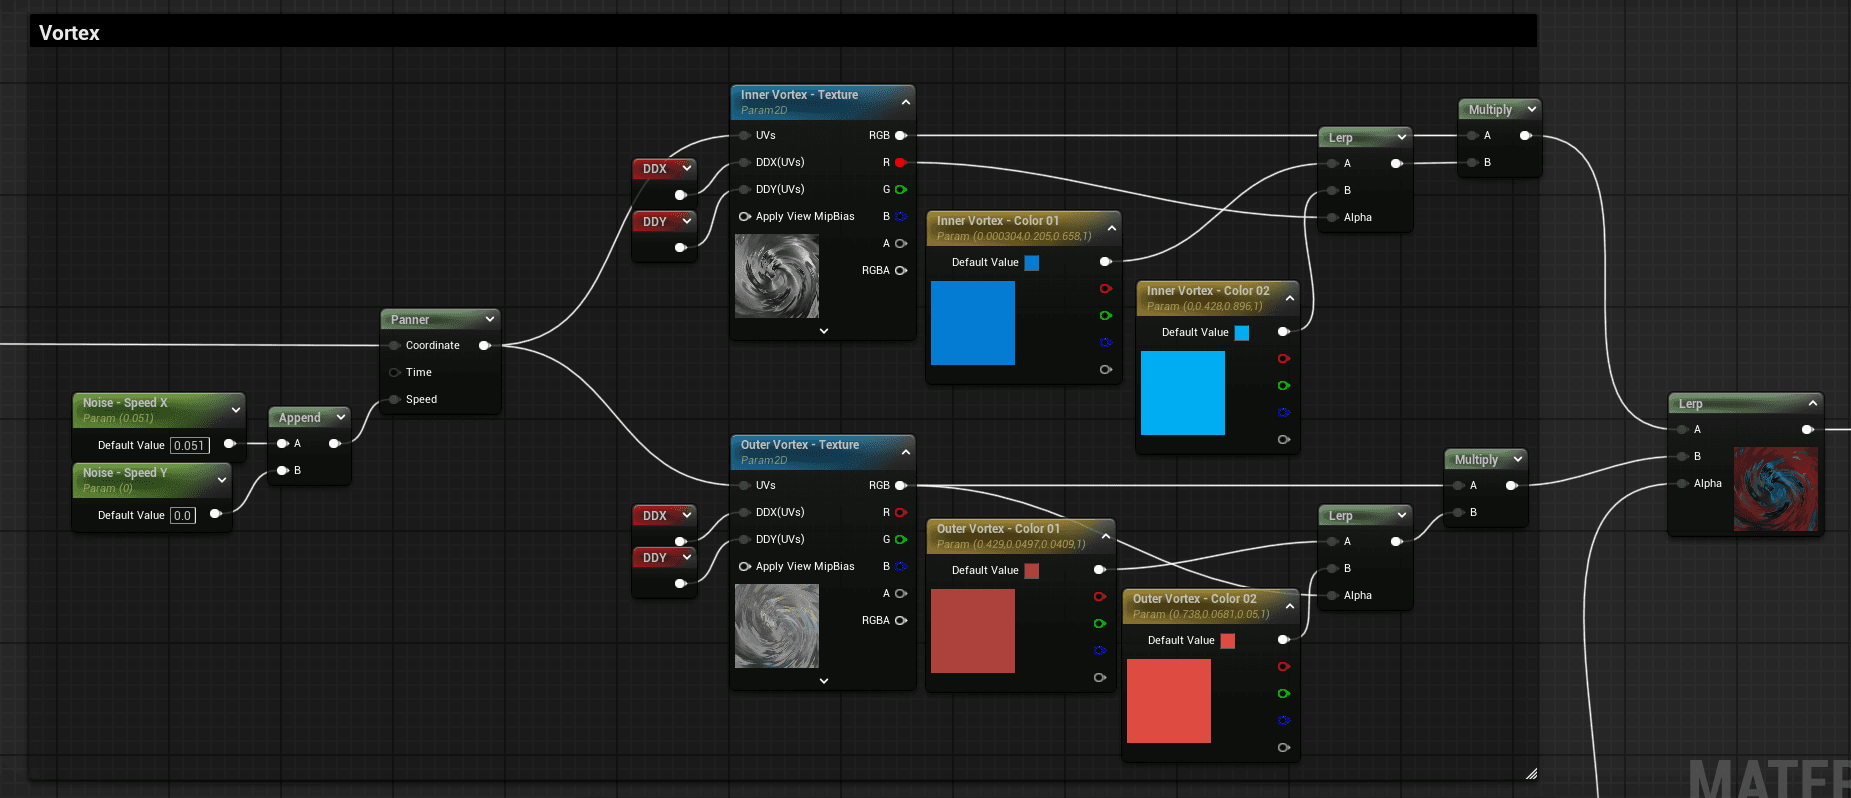
The vortex is quite simple; we just need a noise texture and apply distortions to the respective UVs. To remove artifacts caused by the polar coordinates, we change the mip to Derivative and add DDX and DDY.
To tint the textures with two colors, I use a simple process: Color 01 in A, Color 02 in B, the texture in the alpha, and then multiply the result of this lerp with the texture itself to enhance the gray tones of the texture.
Step 04: Vortex Mask
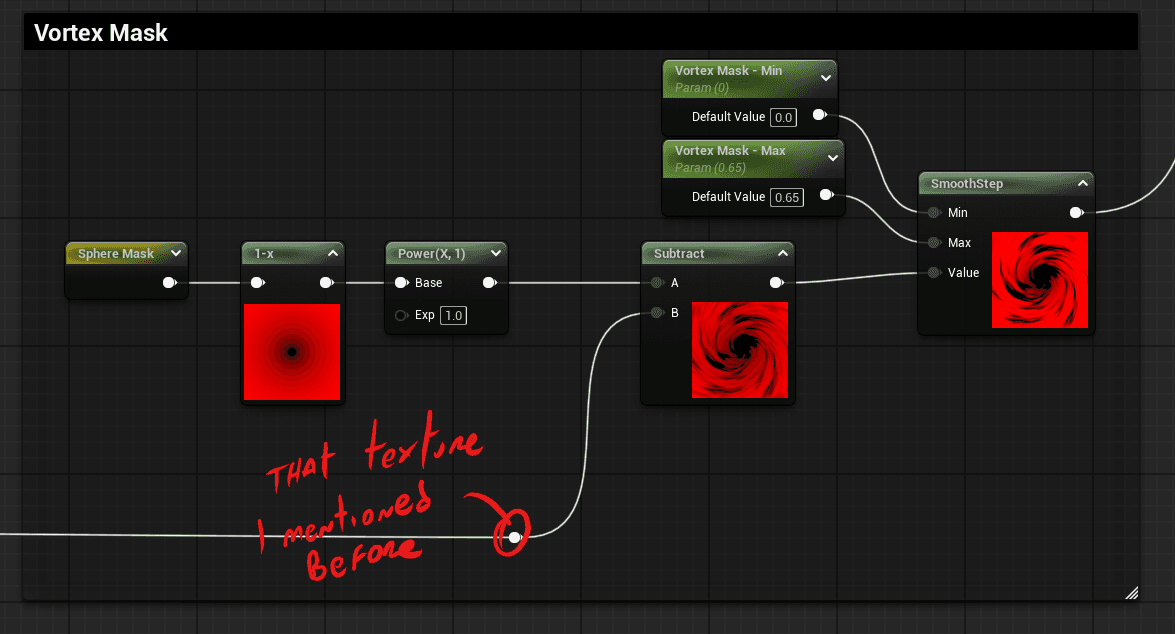
Here, I’m using the sphere mask together with the noise texture I mentioned earlier. Multiplying the two will create the mask we need to make the inner vortex visible, and the SmoothStep will control how much of that information is visible.
Step 05: Layering
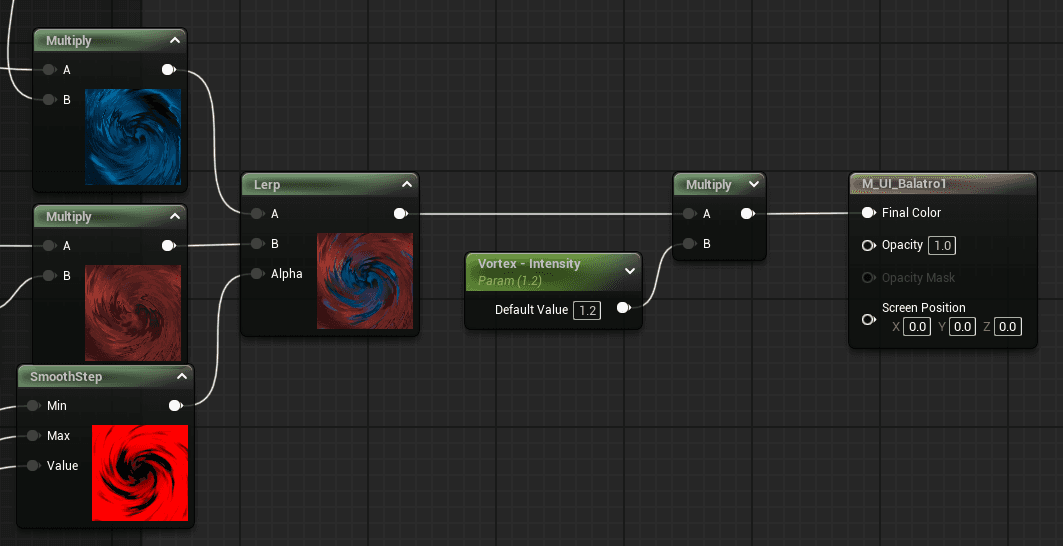
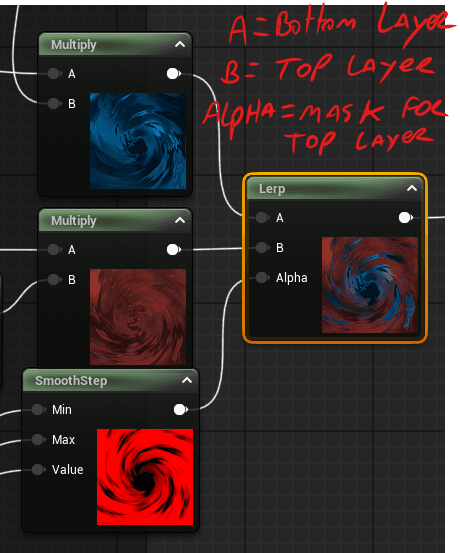
The technique for layering is simple. We just need a lerp node. In A, we place everything that will stay in the first layer (or bottom layer, as I like to call it), and in B, we place the top layer. However, to position it on top, we need to create a 'clipping mask,' which will be our Alpha. This is where the mask we created comes in.
Here’s an article with other examples of using lerps: https://joyrok.com/2D-Tech-Art-Chronicles-Lerp.
Conclusion
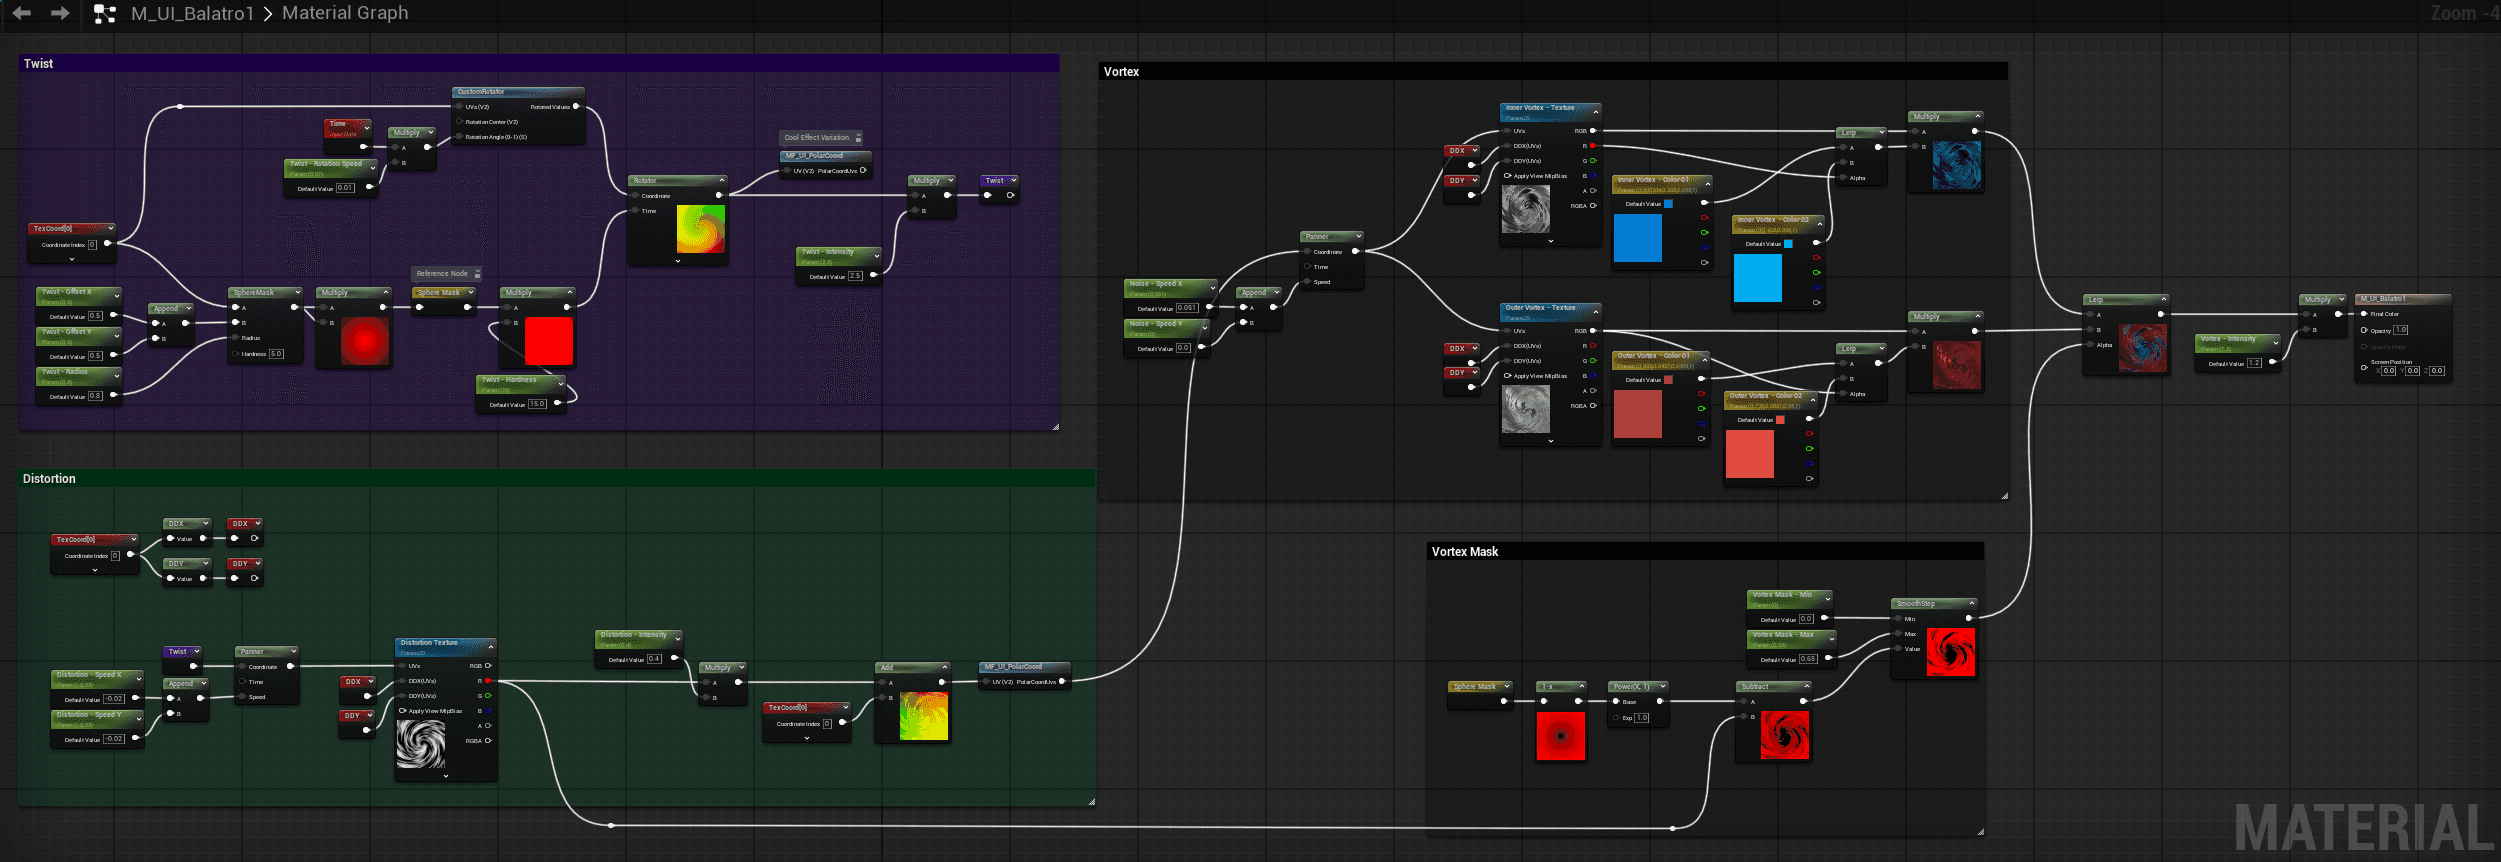
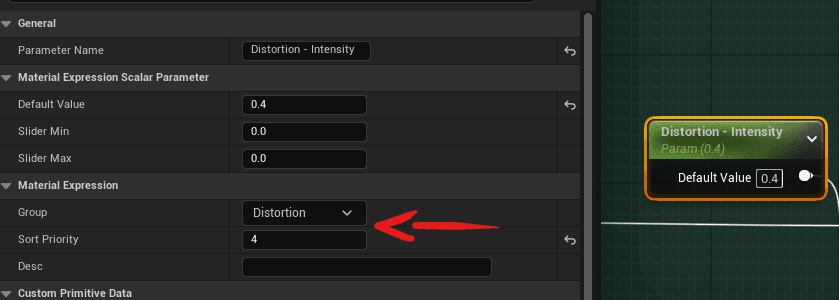
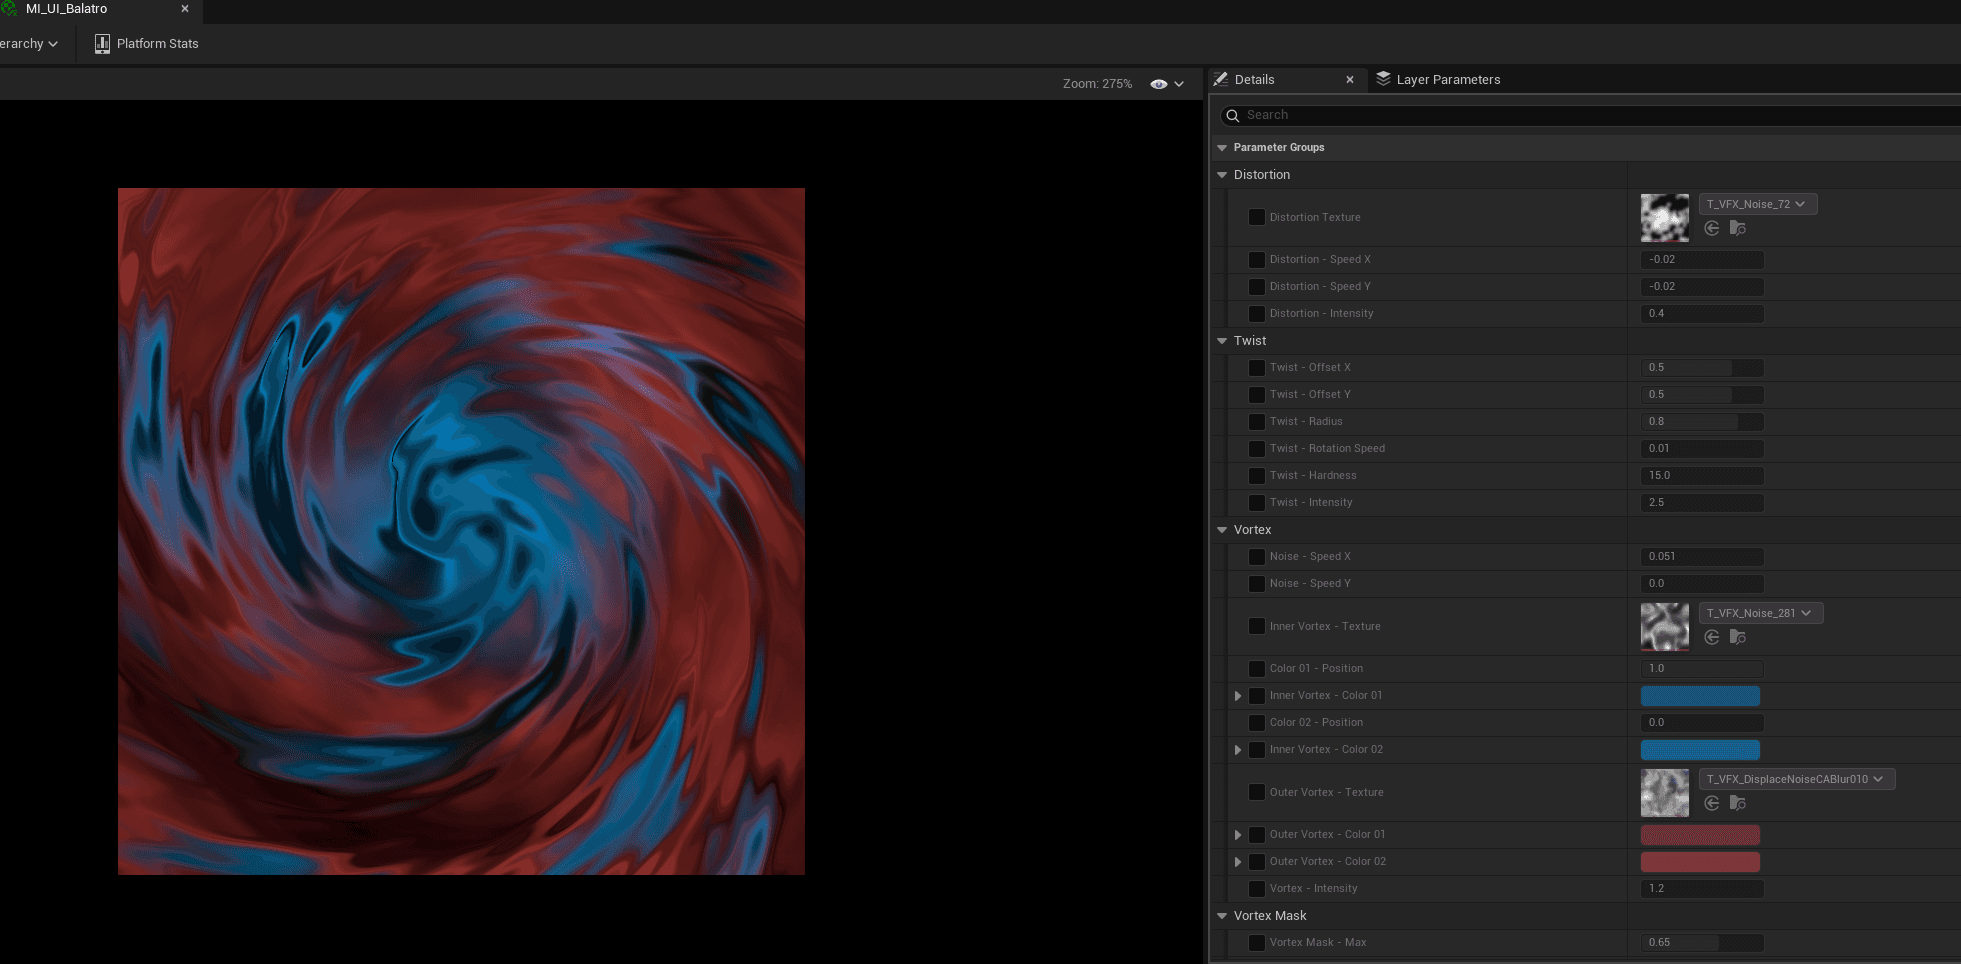
This is what our shader will look like in the end. To keep materials and instances more organized, we can group the parameters and order them accordingly.
Balatro is a roguelike deck-building game developed by LocalThunk, you can find it on steam: https://store.steampowered.com/app/2379780/Balatro/
